|
|
Post by TAY666 on Mar 20, 2010 11:25:45 GMT -5
In an attempt to draw more traffic and discussion here I am going to document my building of this kit. Some of the pictures will be the same ones used on my website also. But a lot of these pics won't be found there. They would be kind of redundant on the webpage, but might be interesting to those really interested in how these go together. I will be going into more detail and discussion of what I am doing, and why I am doing it. Feel free to ask questions or make comments.  |
|
|
|
Post by TAY666 on Mar 20, 2010 13:39:51 GMT -5
Well, I will start this off with the body. Even with a ton of rubber bands, I still ended up with gaps after gluing the body together. 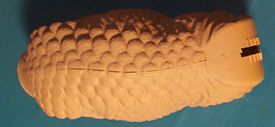 So, first I knocked down any excess glue and miss-match with the dremel and a micro-bit. Taking care to get between the scales and such. Then I went in with some epoxy putty. Making sure to smoosh it into the gap. I also smeared a little on the top of each scale even if it didn't have a gap.  This gave me something to work with to bring the texture back that the dremel removed. I used a tooth pick and worked my way over each scale while the putty was still setting up. Then I used just a touch of water to take the rough edges off and make it look more natural.  That took care of the back, but what about the belly? Well, I didn't need any putty there, as the joint was nice and tight. But I did need to hit it with the dremel to even things out and remove the joint from view.  Still not quite there yet, as you can see. But I am close, so I went ahead and glued the tail on. That way I can work both pieces at he same time. Save myself a few trips to the basement.  This shows what I am talking about as far as excess glue and joint mis-match. What I have to deal with there on the top of the tail is just like what I had to deal with on the bell.  While this gap on the bottom of the tail is just like the gap on the top of the model. Won't know how bad the joint between tail and body actually is, until I get some primer on it to check the transition. |
|
|
|
Post by TAY666 on Mar 20, 2010 13:57:58 GMT -5
Now, for the legs. First problem was the feet. The nails on each foot had some sharp edges.  As you can see from where I scraped away at it, it wasn't only on the bottom edge, but also the top of each nail that had an issue. 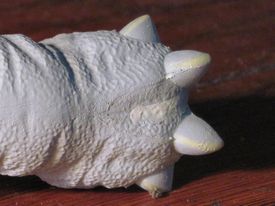 Then of course, there was the seam that ran between the toes. I had to putty the gap, and add the texture back in again. Looks pretty good once it is primered 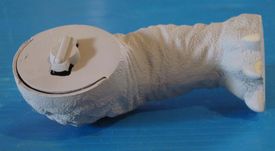  Except for this one.  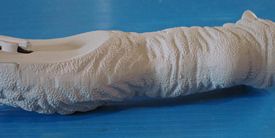 That shouldn't be too bad to take care of. I sitll have to add the texture back in where I cleaned up the seams anyway. As you can see, it's pretty smooth and stands out pretty good.   This one looks like it has a problem, but it doesn't really. That gap in the seam that is still showing up by the should, I won't even worry about yet. It is so close that it should get taken care of when I putty up the joint where this attaches to the body. Remember, I am doing a full putty job on this kit. The legs won't move and that transition will be completely filled and transitioned. 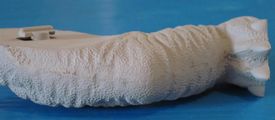  This one still shows a bit of a shadow of where the joint is. But it shouldn't be a big deal. By the time I am done with the texture, that should pretty much obliterate that shadow. Sometimes, it's iffy. The shadow will still show through the texture. But from my experience, this shouldn't be one of those times. I will keep an eye on it as I work it though. Nothing worse than knocking yourself out on detailing, only to have to go back in and putty over it all again. |
|
|
|
Post by stevekelley on Apr 12, 2010 15:07:32 GMT -5
Sweet, this is going to be very cool!
|
|
|
|
Post by TAY666 on Nov 20, 2010 21:51:20 GMT -5
Back to work on this kit again. Almost there with the work on the body. 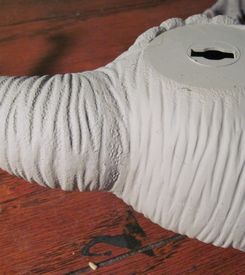  Just a little more texture work and I will be happy with it. Next will be work on the head. |
|
stormnl
Full Member
   Dutch mammoth Collector
Posts: 121
|
Post by stormnl on Nov 21, 2010 5:50:29 GMT -5
cool ,,nice threads,,very informatic
|
|
|
|
Post by TAY666 on Dec 31, 2010 23:42:42 GMT -5
|
|
|
|
Post by TAY666 on Jan 16, 2011 22:07:15 GMT -5
 I have the head on now. Still have a lot of work to do on those leg joints. But I needed to get the head on also, as I had to have my daughter decide where she wanted it positioned while she was still home from school. Otherwise the head was going to have to wait until either spring break, or WF. |
|
|
|
Post by TAY666 on Nov 6, 2011 9:38:28 GMT -5
Finally got back to work on this one.
Will get some new pics up tonight.
Last night, I got the spikes put on the head, and got most of the seam work done on the rear leg joints.
|
|
|
|
Post by desslock on Nov 6, 2011 11:42:21 GMT -5
Good stuff - getting rid of all the seams/cracks in the crest must be one of the toughest parts in this kit.
|
|
|
|
Post by drytoad1 on Nov 6, 2011 18:00:13 GMT -5
Nice job! I should've puttied up the seams on the ones I did for the Styraco diorama.... There's always next time! :}
|
|
|
|
Post by TAY666 on Nov 6, 2011 21:15:35 GMT -5
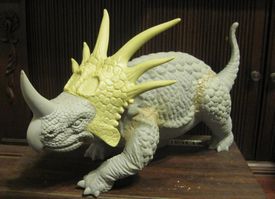  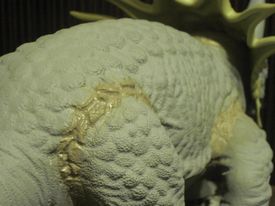 Ok. All the parts are on it now. Now I just need to finish things up. |
|
|
|
Post by TAY666 on Nov 6, 2011 21:20:37 GMT -5
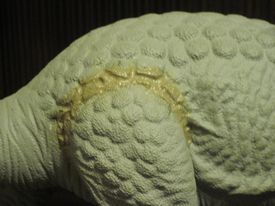 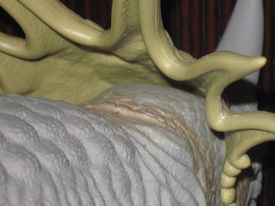   As you can see in those shots. I still have some clean-up to do on my putty work. I will wait until I get a coat of primer on it, and see what it looks like then. That will also give me some good contrast for when I start dremeling some of the rougher areas. Then I have to deal with the seam where the crest attaches to the head. But that shouldn't be too bad. |
|
|
|
Post by TAY666 on Apr 4, 2012 20:27:47 GMT -5
|
|
|
|
Post by pbbass3313 on Apr 6, 2012 13:34:38 GMT -5
Man, thank you! I'm having some issues with my Zuniceratops, and you may have helped men a lot of them....
Waht are You using for putty on the legs, the stuff that Alchemy Mike sells?
|
|
|
|
Post by TAY666 on Apr 6, 2012 15:57:22 GMT -5
|
|
|
|
Post by prescenes2 on Apr 11, 2012 0:32:38 GMT -5
Beautiful seem work Trevor!   I'll be doing some major puttying on my Horizon Bronto conversion eventually. I'm thinking, you might recieve a large package in the near future, since you love puttying up these bad boys! ;D |
|